The Insiders Guide to Assembling Gondola Shelving
Every week we receive requests to assemble and install gondola shelving for our clients, but if you prefer to go it alone, gondola shelving is easier to assemble than you think.
Here we discuss some insiders tricks and tips from our experts.
Clear your storage space and organise your shelving
Ensure you start with a blank canvas. Sweep, mop, clear out the rubbish, or anything else you need to do prior to setting up your shelving. Our experts recommend unwrapping all posts and small back panels, as these are the two products you need to start off your shelving run.
Once the space is clean and the pieces you require are ready to go, it’s time to begin.
Start your assembly
Firstly, ensure the feet on each post is screwed all the way in. This will ensure that each post is completely level. If, after assembling each bay, you find that they are wobbly or unstable, this will be due to your floor being slightly uneven, which is a common problem. You can simply adjust the feet to balance out the bay.

If you are putting together a run of shelving, it is best to assemble all the posts and small back panels first. This will ensure you have measured your space correctly, that the run fits the space adequately and that you have the correct amount of posts and back panels required for your space. In addition, if you have to move the shelving for whatever reason, it will be nice and light – once the bay is completely assembled with shelves it can be heavy and difficult to move around.
See how to assemble your first 2 posts and back panel below.
A common mistake when setting up a run of shelving is assuming you need 2 posts per bay. The first bay (or what we refer to as a starter bay) will need two posts, but each additional bay uses the same post as the previous bay. In other words, each add on bay shares its post with the one next to it! We often have customers call to tell us we haven’t given them enough posts, but this is rarely the problem.
Assemble large back panels, kick plates and base shelves
Once you have the complete run set up you will be surprised how quickly you can put the rest of the shelving run together.
Unwrap all the back panels. We find it easier to assemble these bay by bay, working up and down rather than across the run.
When all back panels are on, unwrap the kick plates and add these next.
A common mistake at this point is adding the base shelf prior to the kick plate, but if you do this, you then have to lift each shelf in order to slot the kick plate in, so it is much easier to do it the other way around.
After the kick plates come the base shelf – by this stage your shelving run will really be taking form!
Adding the brackets and shelves
Now it’s time for the brackets. This is where prior planning is important – you need to know how much space you need to leave between each shelf, and this will all depend on your products height and weight.
Once again, complete one full bay prior to completing the run and make sure you are completely happy with the shelf brackets levels prior to moving onto the next bay – it is a tedious task to have to rearrange all the shelf levels once they are in place.
And finally, once the brackets are in place it is time to place the shelves on top. Each shelf should fit snugly into the bracket and the final result should be stable and secure.
And there you go – I bet it was easier than you thought!
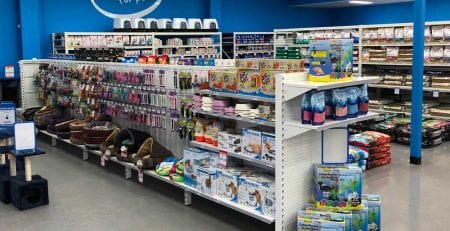
Below is an example of a fit out we completely recently in Melton, showing each stage of assembly.
Remember – we offer an assembly and installation for a fee, so if you’d prefer to leave it to the experts, we are more than happy to help.